Setup a LDAP Server (OpenLDAP)
My reason for running a LDAP server is to learn how to use a directory service like Active Directory.
Scope
- Install and configure OpenLDAP Server
- Using Apache Directory Studio
- Setup Authentication
- Add Users and Groups
1. Setup a Virtual Machine of Ubuntu
- I will be using Linux Mint as my distro.
- Download an ISO of Linux Mint at https://linuxmint.com
- Go to the Download page and download the latest version of Linux Mint.
- Go to VirtualBox and create a new virtual machine.
- Set the name of the virtual machine. Mine is called "LDAP Server"
- Set the ISO image to the Linux Mint ISO.
- Set the base memory. I set the Base Memory to "3072 MB".
- Set the number of CPUs (Processors). I set the number of CPUs to 2.
- Set the size of the Hard Disk. I set the size of the Hard Disk to "34.00 GB".
- Then click Finish.
- Setup Linux Mint and add a username and password for it.
1. Install SSH
Install SSH
sudo apt install openssh-serverOn VirtualBox, Right click on the Virtual Machine, go to "Settings...". Go to Network -> "Port Forwarding", and set the the port forwarding rules for the Virtual Machine:
- Name: SSH
- Protocol: TCP
- Host IP: ""
- Host Port: 2222
- Guest IP: ""
- Guest Port: 22
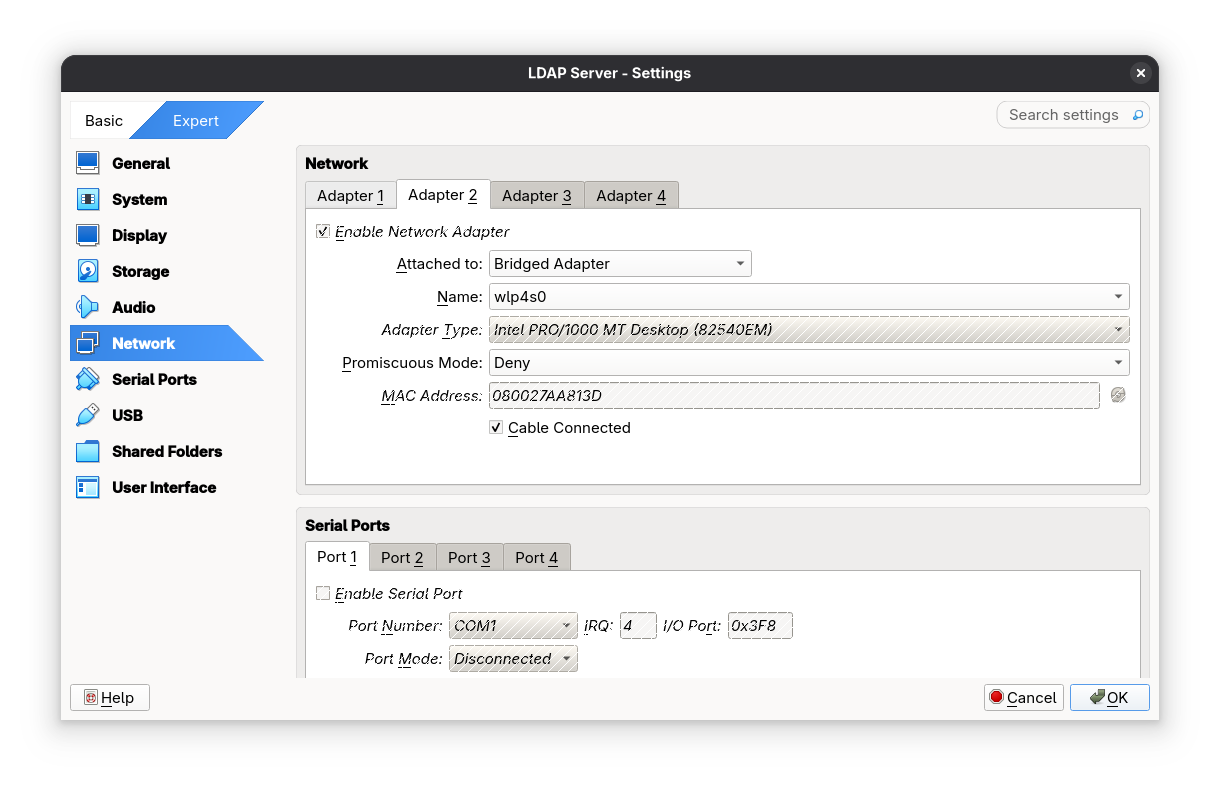
Stay on the settings of the Virtual Machine. Go to Network -> Adapter 2, and set it to "Bridged Adapter" for the Virtual Machine.
Make sure the port 2222 is open
nmap 192.168.56.1 -p 2222SSH to the virtual machine
ssh sage@192.168.56.1 -p 22222. Install and Configure OpenLDAP
Install the packages for slapd
sudo apt install slapd ldap-utilsChange the Directory Information Tree (DIT) suffix
sudo dpkg-reconfigure slapdChange the DNS domain name to
example.comTest that the database "example.com" is created:
ldapsearch -x -LLL -H ldap:/// -b dc=example,dc=com dn3. Add Account Data and Password to the LDAP Database
Install vim or any text editor you like
sudo apt install vimCreate a file called “add_content.ldif”.
touch add_content.ldifAdd the following content to “add_content.ldif”:
dn: ou=People,dc=example,dc=com
objectClass: organizationalUnit
ou: People

dn: ou=Groups,dc=example,dc=com
objectClass: organizationalUnit
ou: Groups

dn: cn=miners,ou=Groups,dc=example,dc=com
objectClass: posixGroup
cn: john
gidNumber: 10000

dn: uid=john,ou=People,dc=example,dc=com
objectClass: inetOrgPerson
objectClass: posixAccount
objectClass: shadowAccount
uid: john
sn: Doe
givenName: John
cn: John Doe
displayName: John Doe
uidNumber: 10000
gidNumber: 10000
userPassword: johnldap
gecos: John Doe
loginShell: /bin/bash
homeDirectory: /home/ldap/john
Add the content to database "example.com":
ldapadd -x -H ldap:/// -D cn=admin,dc=example,dc=com -W -f add_content.ldifCheck that the entry with the uid “john” is actually in the database "example.com":
ldapsearch -x -H ldap:/// -LLL -b dc=example,dc=com 'uid=john' cn gidNumber4. Using Apache Directory Studio
Apache Directory Studio is a GUI client used to manage users and groups for any LDAP server.
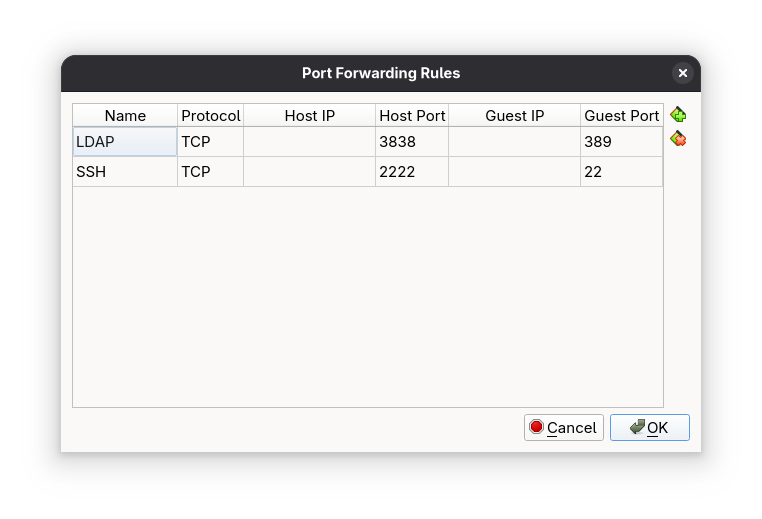
On VirtualBox, Go to the settings of the Virtual Machine. Go to Network -> Port Forwarding, and set the the port forwarding rules for the Virtual Machine:
- Name: LDAP
- Protocol: TCP
- Host IP: ""
- Host Port: 3838
- Guest IP: ""
- Guest Port: 389
Check if the port 3838 is open
nmap 192.168.56.1 -p 38384.1 Setup Connection to the LDAP Server
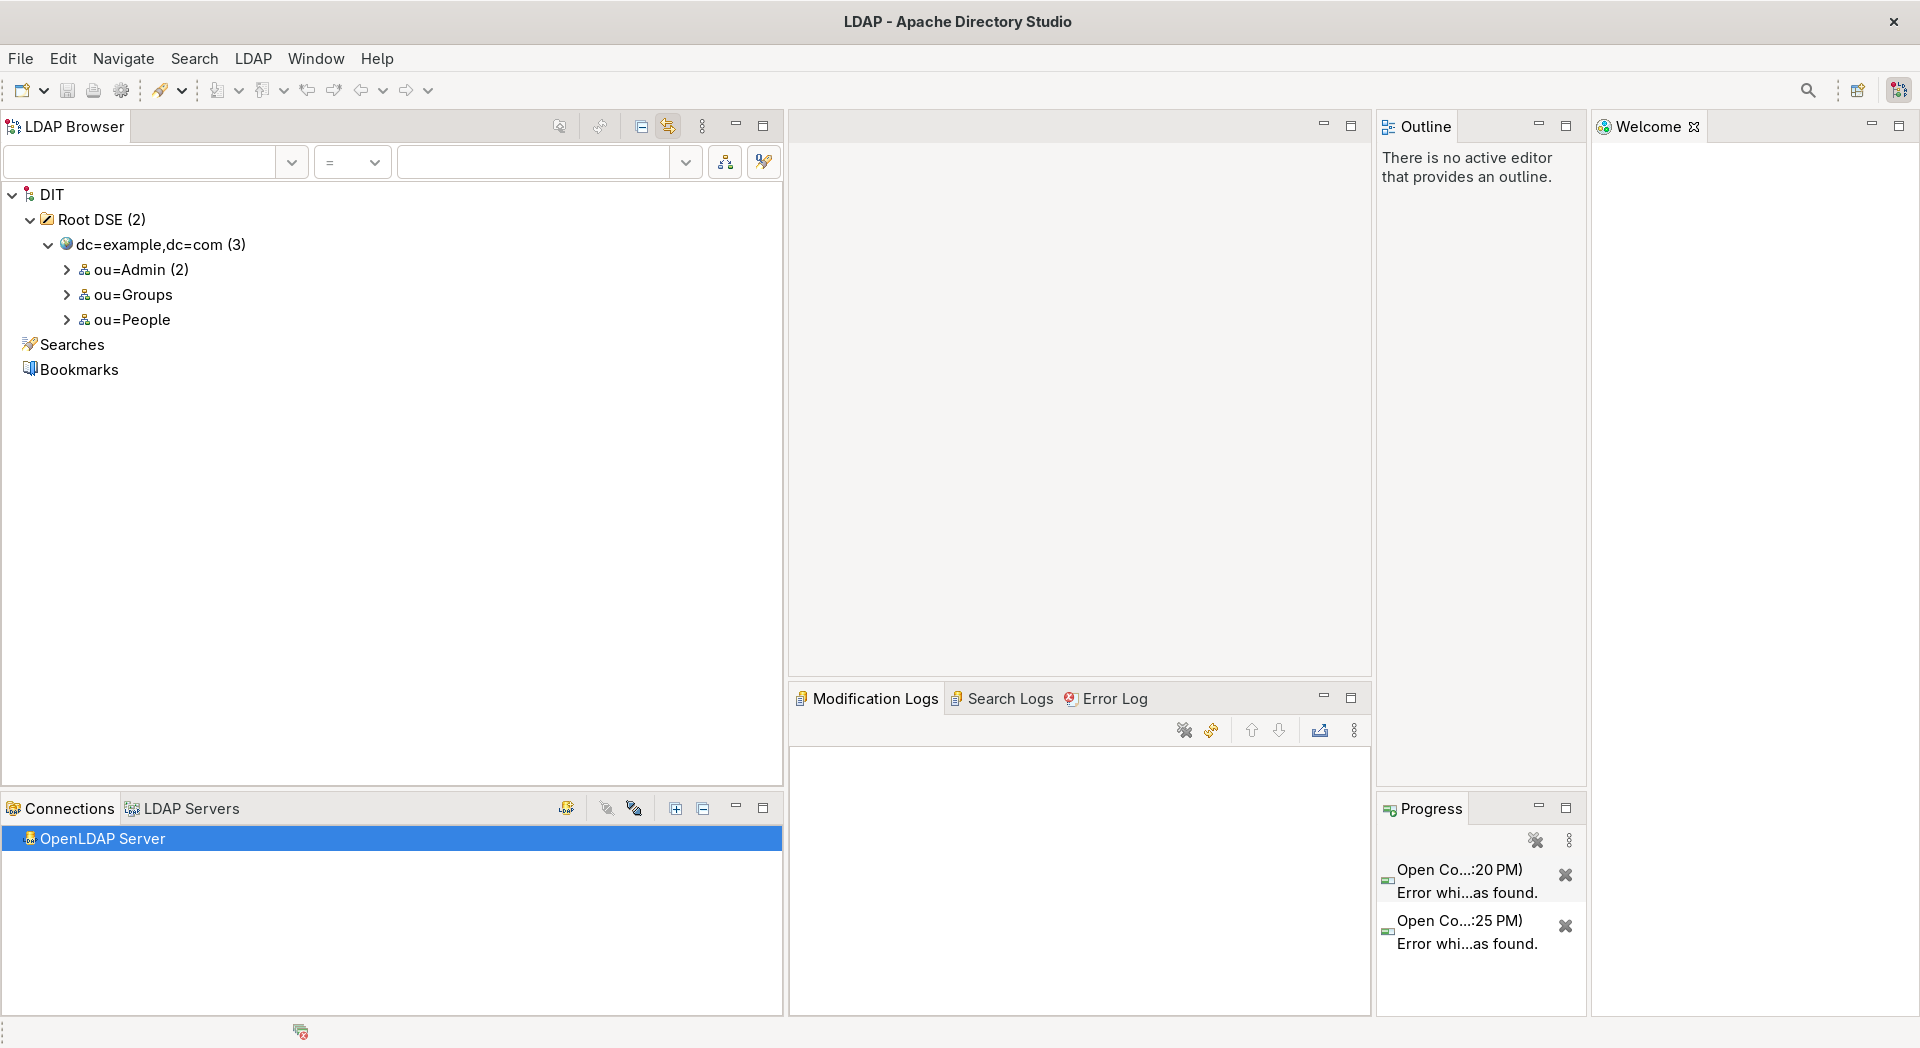
Go to File -> New -> LDAP Browser -> LDAP Connection Set the information for the New LDAP Connection
- Connection name: OpenLDAP Server
- Hostname: 192.168.56.1
- Port: 3838
Connection name:
OpenLDAP ServerHostname:
192.168.56.1Port:
3838Click Next
Set the Bind DN or user as “cn=admin,dc-example,dc=com”and set the Bind password.
Set the Bind DN or user as:
cn=admin,dc=example,dc=comClick "Finish"
You are able to add, update, and delete users and groups for the LDAP server with Apache Directory Studio.
4.2 Add Users and Groups
4.2.1 Add a Group
Right click on the entry containing “dc=example,dc=com” and click New -> New entry
Keep the option “Create entry from scratch” and click next.
Search up “organizational” and select “organizationalUnit”.
Add this object and click next.
Set the ou to whatever you want, in my case I will set it to "Admin".
ou:
AdminClick next
If the information looks correct to you, click finish.
4.2.2 Add a User to a Group
Right click on any group entry. In my case it would be a group called "Admin". Then click New -> New entry.
Keep the option “Create entry from scratch” and click next.
Search up “inet” and select “inetOrgPerson”.
Add this object and click next.
Set the uid to whatever you want, in my case I will set it to “sam”. When you are done, click next.
uid:
samSet the cn, common name, value to a full name. I will use “Sam Paul” as the value for cn.
cn:
Sam PaulSet the sn, surname, value to a last name. I will use “Paul” as the value for sn.
sn:
PaulIf the information looks correct to you, click finish.
5. VirtualBox Conflicts with KVM (Linux)
5.1 Disable KVM for the Current Session
You should disable the kvm modules for VirtualBox to work on Linux.
If you are using an Intel CPU, disable the kvm_intel module
sudo modprobe -r kvm_intelIf you are using an AMD CPU, disable the kvm_amd module
sudo modprobe -r kvm_amdCheck the kvm modules is disabled
lsmod | grep kvmYou should see no output
5.2 Disable KVM Permanently
If you want to disable the kvm modules permanently, create the /etc/modprobe.d/blacklist.conf file
sudo touch /etc/modprobe.d/blacklist.confOpen the /etc/modprobe.d/blacklist.conf file
sudo vim /etc/modprobe.d/blacklist.confThe /etc/modprobe.d/blacklist.conf file should look like this
blacklist kvm_intelIf you are using an AMD CPU, replace kvm_intel with kvm_amd
Reboot the PC and the kvm modules should not be running
Check the kvm modules is disabled
lsmod | grep kvmYou should see no output
Resources
- Make Raspberry Pi Into a LDAP Server to Store User Account Data and Password - Autodesk Instructables
- Install and configure LDAP - Ubuntu
- Raspberry Pi openLDAP Server - The Urban Penguin
- Creating Groups in OpenLDAP using Apache Directory Studio - Robert Munn
- Adding People to Groups in OpenLDAP using Apache Directory Studio - Robert Munn
- The ldapsearch Command-Line Tool - LDAP Documentation
- Install and configure LDAP - Ubuntu
- OpenSSH server - Ubuntu
- VirtualBox can't operate in VMX mode - superuser